refer to Apple Documentation
Text
A Text view displays read-only text.
Text("Hamlet")
    .font(.largeTitle)
Text("by William Shakespeare")
    .font(.caption)
    .italic()
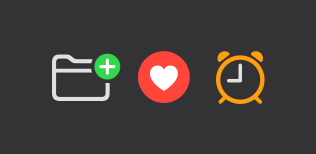
Image
HStack {
    Image(systemName: "folder.badge.plus")
    Image(systemName: "heart.circle.fill")
    Image(systemName: "alarm")
    Image("Yellow_Daisy")
        .resizable()
        .scaledToFit()
}
.symbolRenderingMode(.multicolor)
.font(.largeTitle)
AsyncImage
Image which from a server.
AsyncImage(url: URL(string: "https://example.com/icon.png"))
    .frame(width: 200, height: 200)
Label
Label("Favorite Books", systemImage: "books.vertical")
    .labelStyle(.titleAndIcon)
    .font(.largeTitle)

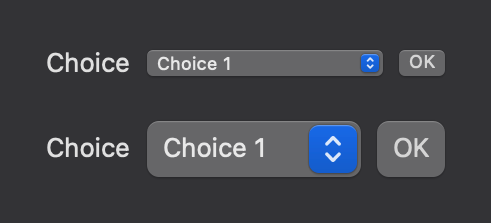
Controls & Picker & Button
VStack {
    HStack {
        Picker("Choice", selection: $choice) {
            choiceList()
        }
        Button("OK") {
            applyChanges()
        }
    }
    .controlSize(.mini)
    HStack {
        Picker("Choice", selection: $choice) {
            choiceList()
        }
        Button("OK") {
            applyChanges()
        }
    }
    .controlSize(.large)
}
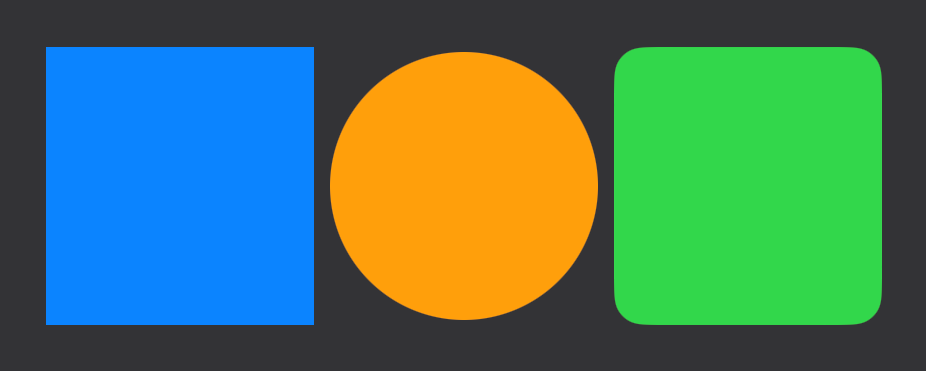
Rectangle & Circle & RoundedRectangle
HStack {
    Rectangle()
        .foregroundColor(.blue)
    Circle()
        .foregroundColor(.orange)
    RoundedRectangle(cornerRadius: 15, style: .continuous)
        .foregroundColor(.green)
}
.aspectRatio(3.0, contentMode: .fit)
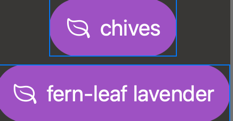
Capsule
Label(keyword, systemImage: symbol)
            .font(.title)
            .foregroundColor(.white)
            .padding()
            .background(.purple.opacity(0.75), in: Capsule())
@ScaledMetric
use for dynamic type size, refer to Apply custom fonts to text
struct KeywordBubble: View {
    let keyword: String
    let symbol: String
    @ScaledMetric(relativeTo: .title) var paddingWidth = 14.5
    var body: some View {
        Label(keyword, systemImage: symbol)
            .font(.title)
            .foregroundColor(.white)
            .padding(paddingWidth)
            .background {
                Capsule()
                    .fill(.purple.opacity(0.75))
            }
    }
}
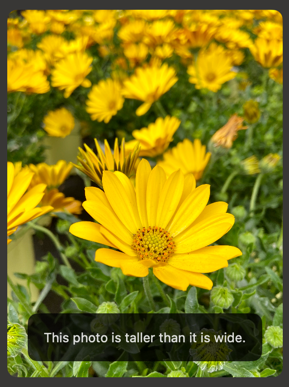
Overlay/Background
遮照
struct CaptionedPhoto: View {
    let assetName: String
    let captionText: String
    var body: some View {
        Image(assetName)
            .resizable()
            .scaledToFit()
            .overlay(alignment: .bottom) {
                Caption(text: captionText)
            }
            .clipShape(RoundedRectangle(cornerRadius: 10.0, style: .continuous))
            .padding()
    }
}

struct Caption: View {
    let text: String
    var body: some View {
        Text(text)
            .padding()
            .background(Color("TextContrast").opacity(0.75),
                        in: RoundedRectangle(cornerRadius: 10.0, style: .continuous))
            .padding()
    }
}
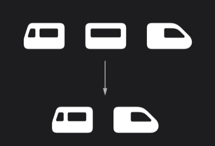
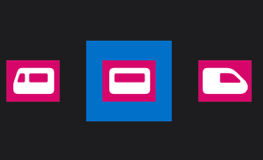
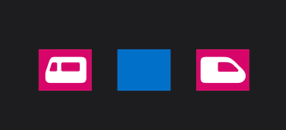
Hide a view
HStack {
Image(systemName: "train.side.rear.car")
if longerTrain {
Image(systemName: "train.side.middle.car")
}
Image(systemName: "train.side.front.car")
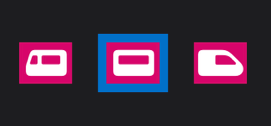
}
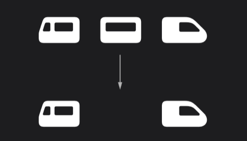
HStack {
    Image(systemName: "train.side.rear.car")
    Image(systemName: "train.side.middle.car")
        .opacity(longerTrain ? 1 : 0)
    Image(systemName: "train.side.front.car")
}
HStack / VStack / ZStack
struct EventTile: View {
    let event: Event
    let stripeHeight = 15.0
    var body: some View {
        HStack(alignment: .firstTextBaseline) {
            Image(systemName: event.symbol)
                .font(.title)
            VStack(alignment: .leading) {
                Text(event.title)
                    .font(.title)
                Text(
                    event.date,
                    format: Date.FormatStyle()
                        .day(.defaultDigits)
                        .month(.wide)
                )
                Text(event.location)
            }
        }
        .padding()
        .padding(.top, stripeHeight)
        .background {
            ZStack(alignment: .top) {
                Rectangle()
                    .opacity(0.3)
                Rectangle()
                    .frame(maxHeight: stripeHeight)
            }
            .foregroundColor(.teal)
        }
        .clipShape(RoundedRectangle(cornerRadius: stripeHeight, style: .continuous))
    }
}

Customize a container’s spacing
import SwiftUI

struct ScaledSpacing: View {
    @ScaledMetric var trainCarSpace = 5

    var body: some View {
        Text("Scaled Spacing")
        HStack(spacing:trainCarSpace) {
            TrainCar(.rear)
            TrainCar(.middle)
            TrainCar(.front)
        }
        TrainTrack()
    }
}

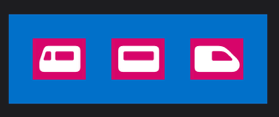
Padding
Default Padding
struct DefaultPadding: View {
    var body: some View {
        Text("Default Padding")
        HStack {
            TrainCar(.rear)
            TrainCar(.middle)
                .padding()
                .background(Color("customBlue"))
            TrainCar(.front)
        }
        TrainTrack()
    }
}
Edge Padding
struct PaddingSomeEdges: View {
    var body: some View {
        Text("Padding Some Edges")
        HStack {
            TrainCar(.rear)
            TrainCar(.middle)
                .padding([.leading])
                .background(Color("customBlue"))
            TrainCar(.front)
        }
        TrainTrack()
    }
}

Specific amount of padding
struct SpecificPadding: View {
    var body: some View {
        Text("Specific Padding")
        HStack {
            TrainCar(.rear)
            TrainCar(.middle)
                .padding(5)
                .background(Color("customBlue"))
            TrainCar(.front)
        }
        TrainTrack()
    }
}
Padding position
struct PaddingTheContainer: View {
    var body: some View {
        Text("Padding the Container")
        HStack {
            TrainCar(.rear)
            TrainCar(.middle)
            TrainCar(.front)
        }
        .padding()
        .background(Color("customBlue"))
        TrainTrack()
    }
}
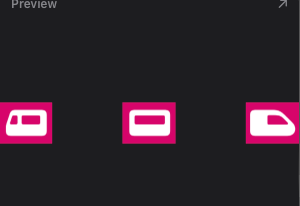
Space
How to create a space.
Spacer
struct AddingSpacer: View {
    var body: some View {
        Text("Spacer")
        HStack {
            TrainCar(.rear)
            Spacer()
            TrainCar(.middle)
            Spacer()
            TrainCar(.front)
        }
        TrainTrack()
    }
}
opacity
struct AddingPlaceholder: View {
    var body: some View {
        Text("Spacing with a Placeholder")
        HStack {
            TrainCar(.rear)
            TrainCar(.middle)
                .opacity(0)
                .background(Color("customBlue"))
            TrainCar(.front)

        }
        TrainTrack()
    }
}
Zstack
struct StackingPlaceholder: View {
    var body: some View {
        Text("Stacking with a Placeholder")
        HStack {
            TrainCar(.rear)
            ZStack {
                TrainCar(.middle)
                    .font(.largeTitle)
                    .opacity(0)
                    .background(Color("customBlue"))
                TrainCar(.middle)
            }
            TrainCar(.front)
        }
        TrainTrack()
    }
}

@Binding
指定绑定实例,当前类可以读取和修改它,但是不是这个实例的拥有者,不负责创建这个实例。在传递这个实例的时候,需要在前面加$
import SwiftUI

struct RecipeEditor: View {
    @Binding var config: RecipeEditorConfig

    var body: some View {
        NavigationStack {
            RecipeEditorForm(config: $config)
                .toolbar {
                    ToolbarItem(placement: .principal) {
                        Text(editorTitle)
                    }

                    ToolbarItem(placement: cancelButtonPlacement) {
                        Button {
                            config.cancel()
                        } label: {
                            Text("Cancel")
                        }
                    }

                    ToolbarItem(placement: saveButtonPlacement) {
                        Button {
                            config.done()
                        } label: {
                            Text("Save")
                        }
                    }
                }
            #if os(macOS)
                .padding()
            #endif
        }
    }

    private var editorTitle: String {
        config.recipe.isNew ? "Add Recipe" : "Edit Recipe"
    }

    private var cancelButtonPlacement: ToolbarItemPlacement {
        #if os(macOS)
        .cancellationAction
        #else
        .navigationBarLeading
        #endif
    }

    private var saveButtonPlacement: ToolbarItemPlacement {
        #if os(macOS)
        .confirmationAction
        #else
        .navigationBarTrailing
        #endif
    }
}
@State
指定绑定实例,当前类是该实例的拥有者,该实例也在当前类的生命周期内,并且该实例有任何变动,当前类会重新构建编译,引用最新的实例
import SwiftUI

struct ContentListView: View {
    @Binding var selection: Recipe.ID?
    let selectedSidebarItem: SidebarItem
    @EnvironmentObject private var recipeBox: RecipeBox
    @State private var recipeEditorConfig = RecipeEditorConfig()

    var body: some View {
        RecipeListView(selection: $selection, selectedSidebarItem: selectedSidebarItem)
            .navigationTitle(selectedSidebarItem.title)
            .toolbar {
                ToolbarItem {
                    Button {
                        recipeEditorConfig.presentAddRecipe(sidebarItem: selectedSidebarItem)
                    } label: {
                        Image(systemName: "plus")
                    }
                    .sheet(isPresented: $recipeEditorConfig.isPresented,
                           onDismiss: didDismissEditor) {
                        RecipeEditor(config: $recipeEditorConfig)
                            .presentationDetents([.medium, .large])
                            .presentationBackgroundInteraction(.automatic)
                            .presentationBackground(.regularMaterial)
                    }
                }
            }
    }

    private func didDismissEditor() {
        if recipeEditorConfig.shouldSaveChanges {
            if recipeEditorConfig.recipe.isNew {
                selection = recipeBox.add(recipeEditorConfig.recipe)
            } else {
                recipeBox.update(recipeEditorConfig.recipe)
            }
        }
    }
}
sheet
sheet可以用于管理弹出的表单view, 实例中有两个参数:
isPresented是否展示onDismiss监听isPresented从true变为false,参数是监听方法
import SwiftUI

struct ContentListView: View {
    @Binding var selection: Recipe.ID?
    let selectedSidebarItem: SidebarItem
    @EnvironmentObject private var recipeBox: RecipeBox
    @State private var recipeEditorConfig = RecipeEditorConfig()

    var body: some View {
        RecipeListView(selection: $selection, selectedSidebarItem: selectedSidebarItem)
            .navigationTitle(selectedSidebarItem.title)
            .toolbar {
                ToolbarItem {
                    Button {
                        recipeEditorConfig.presentAddRecipe(sidebarItem: selectedSidebarItem)
                    } label: {
                        Image(systemName: "plus")
                    }
                    .sheet(isPresented: $recipeEditorConfig.isPresented,
                           onDismiss: didDismissEditor) {
                        RecipeEditor(config: $recipeEditorConfig)
                    }
                }
            }
    }

    private func didDismissEditor() {
        if recipeEditorConfig.shouldSaveChanges {
            if recipeEditorConfig.recipe.isNew {
                selection = recipeBox.add(recipeEditorConfig.recipe)
            } else {
                recipeBox.update(recipeEditorConfig.recipe)
            }
        }
    }
}
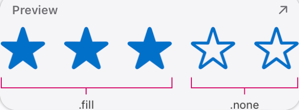
symbolVariant
改变符号的样式
import SwiftUI

struct StarRating: View {
    @Binding var rating: Int
    private let maxRating = 5

    var body: some View {
        HStack {
            ForEach(1..<maxRating + 1, id: \.self) { value in
                Image(systemName: "star")
                    .symbolVariant(value <= rating ? .fill : .none)
                    .foregroundColor(.accentColor)
                    .onTapGesture {
                        if value != rating {
                            rating = value
                        } else {
                            rating = 0
                        }
                    }
            }
        }
    }
}
onTapGesture
根据用户的手势改变View的状态
下面是一个星级评价页面,用户点击评级,再次点击取消评级
import SwiftUI

struct StarRating: View {
    @Binding var rating: Int
    private let maxRating = 5

    var body: some View {
        HStack {
            ForEach(1..<maxRating + 1, id: \.self) { value in
                Image(systemName: "star")
                    .symbolVariant(value <= rating ? .fill : .none)
                    .foregroundColor(.accentColor)
                    .onTapGesture {
                        if value != rating {
                            rating = value
                        } else {
                            rating = 0
                        }
                    }
            }
        }
    }
}
Slider
范围值选定轴
@State private var speed = 50.0
@State private var isEditing = false

var body: some View {
    Slider(
        value: $speed,
        in: 0...100,
        step: 5
    ) {
        Text("Speed")
    } minimumValueLabel: {
        Text("0")
    } maximumValueLabel: {
        Text("100")
    } onEditingChanged: { editing in
        isEditing = editing
    }
    Text("\(speed)")
        .foregroundColor(isEditing ? .red : .blue)
}

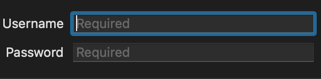
TextField
文本输入框
Form {
    TextField(text: $username, prompt: Text("Required")) {
        Text("Username")
    }
    SecureField(text: $password, prompt: Text("Required")) {
        Text("Password")
    }
}
@State private var username: String = ""
@FocusState private var emailFieldIsFocused: Bool = false

var body: some View {
    TextField(
        "User name (email address)",
        text: $username
    )
    .focused($emailFieldIsFocused)
    .onSubmit {
        validate(name: username)
    }
    .textInputAutocapitalization(.never)
    .disableAutocorrection(true)
    .border(.secondary)

    Text(username)
        .foregroundColor(emailFieldIsFocused ? .red : .blue)
}

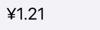
format by local currency:
TextField("",value: $money, format: .currency(code: Locale.current.currency?.identifier ?? "CNY"))
                    .font(.largeTitle)
wrappedValue
如果要读取 @Binding or @State 对象的属性,而不是返回一个绑定对象,那么就需要 wrappedValue
@Binding private var recipe:Recipe

RecipeDetailView(recipe: recipe)
                .navigationTitle(recipe.wrappedValue.title)
上面的代码向navigationTile方法传递了一个String
Custom Binding
@State只能绑定初始化静态值,但如果你需要的值是一个动态值,那么就需要用到自定义绑定
import SwiftUI

struct DetailView: View {
    @Binding var recipeId: Recipe.ID?
    @EnvironmentObject private var recipeBox: RecipeBox
    @State private var showDeleteConfirmation = false

    private var recipe: Binding<Recipe> {
        Binding {
            if let id = recipeId {
                return recipeBox.recipe(with: id) ?? Recipe.emptyRecipe()
            } else {
                return Recipe.emptyRecipe()
            }
        } set: { updatedRecipe in
            recipeBox.update(updatedRecipe)
        }
    }

    ....
}
类中的recipe属性相当于 @State private var recipe:Recipe=...
但是这里的recipe是通过id检索recipeBox得来的,所以静态初始化行不通,就需要自定义Binding。
注意recipe返回的是Binding,闭包中是对Binding的 get 和 set 的实现。
Divider
分隔符
Divider()

TabView
底部主菜单
TabView(selection: /*@START_MENU_TOKEN@*//*@PLACEHOLDER=Selection@*/.constant(1)/*@END_MENU_TOKEN@*/) {
    Text("Tab Content 1").tabItem {Label("首页", systemImage: "house")}.tag(1)
    Text("Tab Content 2").tabItem { Label("详情", systemImage: "list.bullet.rectangle.portrait.fill") }.tag(2)
    Text("Tab Content 3").tabItem { Label("新增", systemImage: "plus.circle.fill") }.tag(3)
    Text("Tab Content 4").tabItem { Label("图表", systemImage: "chart.bar.xaxis.ascending") }.tag(4)
    Text("Tab Content 5").tabItem { Label("我的", systemImage: "person") }.tag(5)
}

获取当前时间
Text(Date(), style: .date)
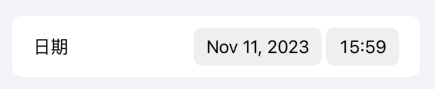
DatePicker
DatePicker(selection: .constant(date), displayedComponents:[.hourAndMinute, .date], label: { Text("日期") })
Map
import CoreLocation
import MapKit
import SwiftUI

struct ContentView: View {

    let locationManager = CLLocationManager()

    @State var region = MKCoordinateRegion(
        center: .init(latitude: 37.334_900,longitude: -122.009_020),
        span: .init(latitudeDelta: 0.2, longitudeDelta: 0.2)
    )

    var body: some View {
        Map(coordinateRegion: $region, showsUserLocation: true, userTrackingMode: .constant(.follow))
            .edgesIgnoringSafeArea(.all)
            .onAppear {
                locationManager.requestWhenInUseAuthorization()
            }
    }
}
货币输入和键盘
TextField("",value: $money, format: .currency(code: Locale.current.currency?.identifier ?? "CNY"))
    .font(.largeTitle)
    .keyboardType(.decimalPad)
阻塞指定时间
一秒后改变状态
DispatchQueue.main.asyncAfter(deadline: .now() + 1) {
    self.isFocused = true
}
focused
只有一个文本框需要自动弹出键盘
注意.onAppear需要在父类层级才会在打开页面时生效,如果直接加到TextField需要延时(参考SwiftUI @FocusState - how to give it initial value 和 SwiftUI: How to make TextField become first responder?)
struct MyView: View {

    @FocusState private var isTitleTextFieldFocused: Bool

    @State private var title = ""

    var body: some View {
        VStack {
            TextField("Title", text: $title)
                .focused($isTitleTextFieldFocused)
        }
        .onAppear {
            self.isTitleTextFieldFocused = true
        }
        .padding()

    }
}
多个文本框需要自动弹出键盘
struct LoginForm: View {
    enum Field: Hashable {
        case usernameField
        case passwordField
    }

    @State private var username = ""
    @State private var password = ""
    @FocusState private var focusedField: Field?

    var body: some View {
        Form {
            TextField("Username", text: $username)
                .focused($focusedField, equals: .usernameField)

            SecureField("Password", text: $password)
                .focused($focusedField, equals: .passwordField)

            Button("Sign In") {
                if username.isEmpty {
                    focusedField = .usernameField
                } else if password.isEmpty {
                    focusedField = .passwordField
                } else {
                    handleLogin(username, password)
                }
            }
        }
    }
}
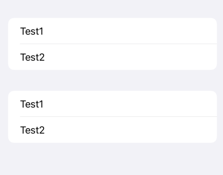
Form Section 带分区的表单结构
Form {
    Section{
        Text("Test1")
        Text("Test2")
    }

    Section{
        Text("Test1")
        Text("Test2")
    }
}
Section 改变边框颜色
Section("AI"){
    TextField("#标签", text: $tag)
}.listRowBackground(
    RoundedRectangle(cornerRadius: 10)
    .stroke(Color(UIColor.systemTeal), lineWidth: 3)
)
系统颜色
Color(UIColor.systemTeal)
Color(UIColor.systemRed)
Color(UIColor.systemCyan)
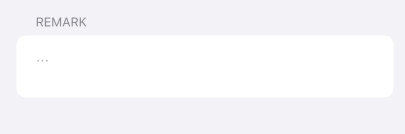
多行的TextField
 TextField("...", text: $remark, axis: .vertical)
    .lineLimit(2...10)
form中隐藏的section,但占用空间
Form{
    Section{
        Button("") {

        }.disabled(true)
    }.listRowBackground(
        Color(.clear)
    )
}
删除Vstack中组件的默认间距
VStack(spacing: 0) {
    Text("1")
    Text("2")
    Text("3")
}
横向滚动栏
showsIndicators 控制是否展示滚动条
ScrollView(.horizontal, showsIndicators: false) {
    HStack{
        ForEach(array, id: \.self) { title in
            Text(title)
        }
    }.padding(8)
}
更改整个背景的颜色
HStack{
}
.padding(.top, 5)
.frame(maxWidth: .infinity)
.background(Color(UIColor.systemGray6))
在点击对应tab时隐藏底部TabBar
struct ContentView: View {
  var body: some View {
    TabView {
      HomeView()
        .toolbar(.hidden, for: .tabBar).
        .tabItem {
          Label("", systemImage: "house.fill")
        }
    }
  }
}
在组件出现之前执行代码块.task
let url = URL(string: "https://example.com")!
@State private var message = "Loading..."


var body: some View {
    Text(message)
        .task {
            do {
                var receivedLines = [String]()
                for try await line in url.lines {
                    receivedLines.append(line)
                    message = "Received \(receivedLines.count) lines"
                }
            } catch {
                message = "Failed to load"
            }
        }
}
Foreach with index
let userList:[String]?
ForEach(Array((userList ?? []).enumerated()), id: \.offset) { index, element in

}
ScrollView to specific location
@State var scrollIndex: Int?

    var body: some View {
        ScrollViewReader { scrollViewProxy in
            ScrollView(.horizontal, showsIndicators: false) {
                HStack{
                    ForEach(Array((users ?? []).enumerated()), id: \.offset) { index, element in
                        Text(element.name ?? "")
                            .id(index)
                    }
                }
                .onChange(of: scrollIndex) {
                    withAnimation {
                        scrollViewProxy.scrollTo(scrollIndex, anchor: .top)
                    }
                }
            }
        }
    }
NavigationLink
make it available, you need to wrap it in a NavigationView
NavigationView{
修改 textfield 键盘上默认的换行按钮
改为确认按钮
TextField("Name", text: $name).submitLabel(.done)
为 decimal pad 加上隐藏按钮
在ToolbarItem中的判断是为了让按钮只在当前textfield中生效
@FocusState private var isFocused: Bool

 TextField("",value: $money
              , format: .currency(code: Locale.current.currency?.identifier ?? "CNY"))
    .keyboardType(.decimalPad)
    .font(.largeTitle)
    .focused($isFocused)
    .toolbar(content: {
        ToolbarItem(placement: .keyboard) {
            if(isFocused){
                HStack{
                    Spacer()
                    Button(action: {
                        UIApplication.shared.sendAction(#selector(UIResponder.resignFirstResponder), to: nil, from: nil, for: nil)
                    }, label: {
                        Text("Confirm")
                    }).scaledToFit()
                }
            }
        }
    })
在Localizable中获取指定的key
String(localized: LocalizedStringResource("Account"))